Friday, December 30, 2011

Beauty Resolutions for 2012!

Greetings!

Lately I've been browsing around my favorite blogs and have noticed a common theme where the blogger will list what plans they have in store for the upcoming year.  Always interested in what others think about how they can progress in the world of beauty I decided that I, too would join in on the fun!  I've compiled a short list of things that I would like to achieve in the new year and I hope that you too will begin to think on what it is that YOU want to do too!  Here goes!

Buy Less, Use More-  In 2011, I must admit that I was a sucker for the hype and fell into a spiral of purchasing items that weren't really necessary but lovely to have.  Don't get me wrong, I love my NAKED palette, crackle polish, mattenes, and FlowerBomb fragrance all the products I purchased throughout the year but there are plenty that I could have done without.  So this year I'm going to opt for the road less travelled by beauty lovers and start shopping my stash more often instead of getting "the next big thing".  Let's cross our fingers on this one!

Get a Real Facial from a Spa-  As often as I like to do my own facial at home with my exfoliators, scrubs, and cleansers I've always wondered what it is like to have this done by professionals.  I always hear great things from those who've tried it and this has peaked  my interest even more.  I would prefer to stay consistent with the spa that I go to so I am going to begin my research on what spas are in my area.

Attend a Beauty Workshop-  Just recently there happened to be a cosmetic exposition in my city that I had no idea was even in town until the actual date.  Needless to say, I was crushed because I didn't attend.  This year, whether it be out of town or local I plan on attending a beauty conference, exposition, something that  offers beauty lovers to revel in all things beauty.  This will allow me meet fellow beauty bloggers and other people that have the same interest and passion that I do.  Who knows, maybe I'll even get to meet one of you! 

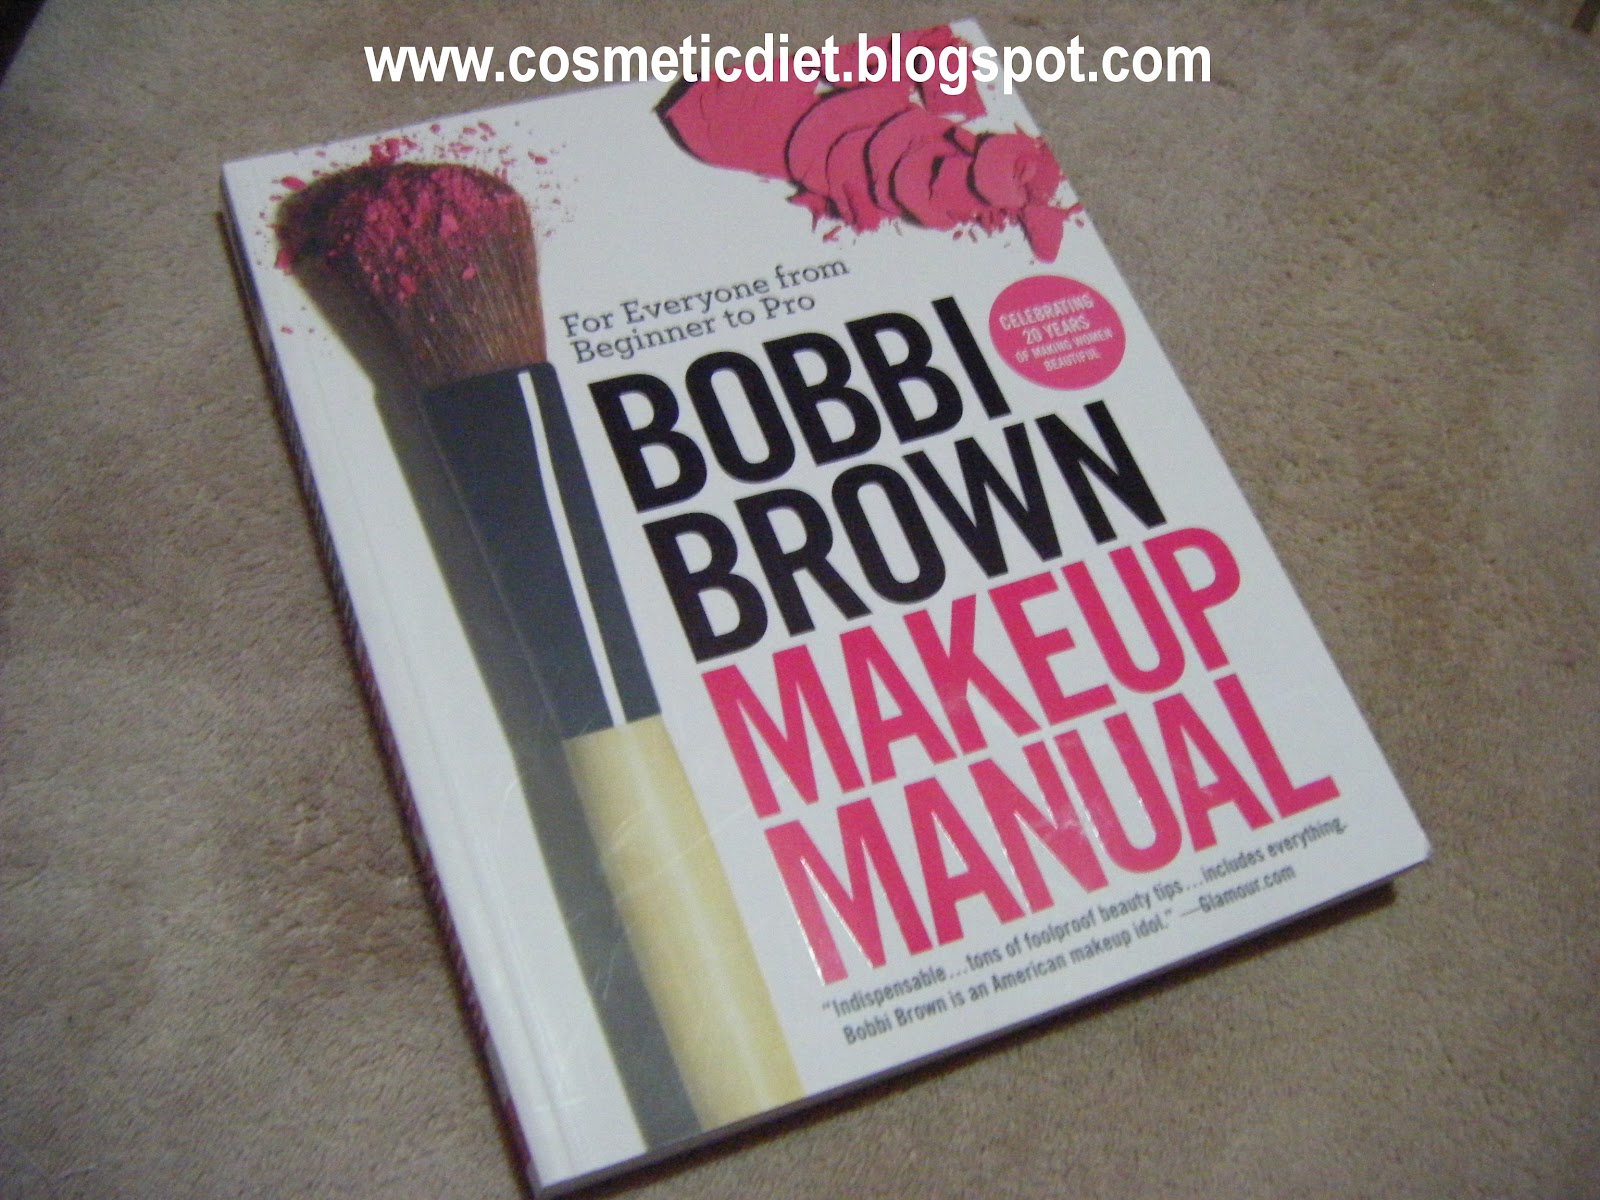
Read More-  As if I don't already read for leisure as is I plan on adding more to my list this year.  Instead these new additions will be beauty books/manuals that will further my knowledge in the arena of beauty.  I hope to grasp new concepts and explore on myself and on people I know.  I have heard about and have been suggested to many of the leading makeup artists out right now in regards to this and I plan to have my list and cash in hand to complete this goal.  

Learn How to Effectively do a Sew In-  I know this may sound silly but I really want to learn how to do this myself.  The women on YouTube make it seem so effortless. Although, this year will not be my first attempt at this task, this year I plan to succeed in doing it myself on myself.  I can already see just how much I'll be saving if I start doing it myself.  Shout out to my hairstylist!  ;)

Become a Better Beauty Blogger-  Although I have just begun on this blogging journey I already have high hopes for it's future and what it can do for others.  This means that I will be making some major moves in the new year to make this blog a better viewing and reading experience for you all.  It means so much that people will actually read and apply the posts that I write to their everyday lives, let's work on this together!


Welp, those are my beauty resolutions for the new year!  What are yours? 

Thursday, December 29, 2011

Make An Entrance with this!

Greetings!

After that Sally Hansen debacle I had to rush to put on another coat of one of my favorite nail polishes by China Glaze.  Make An Entrance has been a part of my nail color routine for a while now and I wanted to share with you just how pretty this color really is.  This is a very pretty raspberry color that applies smoothly for easy coating.  Typically with all of the China Glaze polishes that I own including Make An Entrance the polish is thin, some may not like this but I don't mind because it gives me more control of how much product I should apply for application.  It does have a cream finish and a quick dry time in my opinion. 

I decided to jazz the color up a notch by adding a top coat of Sally Hansen's Diamond Strength top coat in Diamonds.  This top coat adds a flair of silver grace over the cream raspberry finish that I adore.  I particularly like it because of the effect it has in the daylight, almost like a fairy dust minus the Tinkerbell costume. =)

Here are some pics!


Daylight -- no flash


 Isn't it soooooo pretty? 


So, what's the verdict ladies?  Yay or Nay?

Wednesday, December 28, 2011

Sally Hansen Salon Effects--Might Not Make It

Greetings!

Remember last week when we kicked the blog running with a post about the cool Salon Effects line from Sally Hansen?  I'm sure you do, well, it's been seven days and I was really trying to make it to ten days to since the packaged promised such but I could not!  LOL  As much as I liked the color I was NOT about walking these streets with chipped nail polish.  I do have a few things I woul like to share about these though so that you know what to look out for if you're interested.

First, let me start off by saying that the color was beautiful and I really appreciated the fact that I didn't have to worry about drying time which is a plus.  However, I could notice my nail chipping on the first day.  I guess you could say that I do alot with my hands but who doesn't?  Let's be more specific, that evening that I applied the product I had to cook and my nails were close to heat and I had remove the tray, fine, right?  No, the heat melted a tip of the nail polish, I haven't had that happen with my regular nail polish so I'm guessing that the product isn't that durable.

Second, around the fourth day of my manicure I noticed I had some skin peeling and I've never had that happen before with other polishes.  I'm going to go on a whim and say that I can possibly be allergic to an ingredient in this product in order for this to happen.  I take really good care of my nails and I didn't change that routine when using this product it's safe to say that I can attribute Salon Effects to that.

Here are pics of both my left and right hand after seven days with the product.


Right Hand

Left Hand
Overall, I would give this product a 2 out of 5 star rating.  The color is what really kept it on my nails for so long but other than it would have been off that first day. LOL  I would recommend these for a 2 day manicure though since they don't seem to hold up for too long which sucks.  I do intend on trying the designs that they have available from the same line sometime soon and I hope I can get different results.  We'll just have to wait and see.

So what do you think?  Yay or Nay?

How to Create Your Own Beauty Storage

Greetings!
As much as I like to purchase new cosmetics I also have to deal with the fact of overcrowding and how that new beauty item will affect the rest of my storage space.  One day I sat and thought about this issue of too much cosmetics and how I, a proud member of the Sterilite committee would figure this thing out.  Then it came to me like an epiphany!  Not really, more like a bored-one-day-and-feeling-in-a-domestic-type-of-mood way.  Well, anyway, I figured since I have plenty of empty candle jars from Bath & Body Works, why not make due with what I have and turn it into a cute way to store my beauty essentials.  This is a super easy thing to do and takes a little more time to complete but trust me, the outcome is adorable!  You can thank me later, or now, whatever suits your fancy. Let’s start with the things you will need for this project:
Razor Blade (scissors are fine, I use the blades because their sharper and take up less space)
Decorative Tape (I purchased mine from Wally’s World but you can find these at Michael’s or Hobby Lobby)
Bath & Body Works candle jar (you can use whatever jar your heart desires, I just happened to like these jars better)
A Wet Wipe
Scissors

Now for the fun stuff! 
Step 1:  Use the scissors to dig out the wax and metal wick hooks at the bottom of the jar.  To make this task easier, I like to cut up diagonal marks in the wax first so that the pieces come out in chunks rather than in small pieces when you start to dig the wax out.  It should look like this:

At this point, the scissors will have wax all over it so use the wet wipe to clean off all the excess wax you accumulated while removing the wax. 


Step 2:  Now that you've dug out the chunks of wax out of the jar, you will want to begin the hardest part of the process which is removing the metal hooks at the bottom of the jar.  In order to do this the safest way possible I recommend having the jar about 10 inches away from your body.  Now, you can use the scissors to bend the bottom of the metal so that you will have a grip in order to hold on to while pulling it out of the jar.  The hooks are glued on so it will take a little bit of elbow grease on this step. 
Step 3:  Now that you have done that, you want to clean the jar of the smoke build up and wax.  I like to use hot water mixed with fabric detergent to clean my jars.  I then shake it like a  polarid picture for a bit and let it sit and soak for about two hours.


Step 4:  Now let's take that same wet wipe we used earlier for the scissors to wipe clean the jar after it has soaked for about two hours.  Don't forget to simply wet the bottom of the jar with the same warm water and detergent mixture--you will need to do this so that the sticker on the bottom easily glides off.  :)  You'll thank me for this.
Step 5:  Now that the jar is clean and dry you will want to take the decorative tape and razor blade and begin wrapping the tape around the jar.  The razor blade is used to cut the tape once it's been wrapped around the jar.
And Voila!  Your masterpiece is done!  You can choose to wrap the tape to the bottom or leave it alone like I choose to do because I like to be able to see what is inside.  I normally keep my foundation wedges, cotton balls, eyeliners, q-tips, and other things that fit in these jars.  I think it's a crafty way of making sure that your cosmetics don't take over your space--at least this does that but decoratively :D


So what do you think, ladies?  Yay or Nay?


Tuesday, December 27, 2011

A Product That I Can’t Shake—Queen Helene Mint Julep Masque, The Original

Greetings!
Have you ever had that feeling where you felt your face was against you?  Whether it be your time of month or you may be going through a stressful time in your life, we all go through it and sadly you can always tell because the face says it all. BOOOO!  Unfortunately, that stress and change of hormones can have dramatic effects on one’s skin, trust me, I know the struggle.   It was always hard to find a product that delivered on its promises and when I did find one I liked it would be discontinued, never to encounter my face again. L  But that was until I met the Queen, not Latifah, not Beyonce, but one can dream, right?  I met Queen Helene, the answer to clearing up my skin of pesky blackheads and adolescent pimples.
Around my junior year of high school I discovered what would be my saving grace in a jar.  It has been six years and I still remain faithful to this product because it works so well.   Here’s what it promises:
The original natural home treatment to help dry up pimples, rinse away blackheads and shrink enlarged pores.  As the masque firms and hardens, it draws out impurities from the pores.  Your skin will feel clean, refreshed and smooth.   
Yup, that’s about right, although I don’t suffer from massive pimples on my face I can tell that it minimizes pimples that may pop up thanks to Aunt Flo and blackheads, PIECE OF CAKE, I apply this masque one day and blackheads are gone the next. 
There is a mint scent to it that I find refreshing and makes me feel like I’m getting a spa like facial.  The smell isn’t overpowering but it is something to consider if you aren’t a fan of scents on your facial products.  The consistency is that of a thicker version of toothpaste, not too thick and not too thin.  You are supposed to apply it evenly over the face and neck so that it isn’t too thick all over those areas.  After that you let it dry on your face for about 15 minutes, I normally leave mine on for 25, but this is all preference and I find that that works for me.  It dries to a paste, to which you have to rinse off with warm water.  I then pat my face dry with a towel and moisturize my face with my favorite moisturizer by Aveeno.  After that my face usually feels fresh and brighter than it did before.  Oh, by the way, I use this once a week now but when I first started using it I would apply it about twice a week.  Overall I would recommend this product because it is affordable, accessible, and effective.  You can find this at Sally Beauty Supply or your local Wal-Mart, that’s where I normally purchase it from.

I would have posted a picture of me with the masque on but I didn’t want to scare the small children that may or may not be in the room with you. :D   
What do you think ladies?  Yay or Nay?

Monday, December 26, 2011

Beauty Book Read Puts You In The Know!

Greetings!
I hope that all of you were able to enjoy this year’s festive holiday season with family and friends like I did.  I am so glad that this Christmas fell on a Sunday because to me it makes the holiday that more eventful because it is on a weekend, LOL.  While lounging around after the gifts were open and the basketball games were played (Miami Heat won, by the way!  YEEEEEESSS! ) I took to my coffee table to rummage through old magazines and beauty books that I enjoy reading.  I came across a favorite of mine by the amazing Bobbi Brown, also known as the CCO of Bobbi Brown Cosmetics.
This book contains beautiful imagery and detailed instructions on how to achieve a desired look.  The book is simple and offers a step by step guideline for succeeding in beautiful makeup application.  What I can appreciate about Bobbi Brown is her desire to make a woman feel and look naturally beautiful.  As some of you may know BEATING YOUR FACE TO THE GAWDS isn’t always work or school friendly so it is nice to have a book that can teach you the basics of makeup so that those from a beginner to that of a professional can grasp the concepts easily. 


In this book you will find it offers notes on tools recommended, how to achieve age appropriate makeup, as well as what kinds of foods benefit your overall skin experience.  As a person that likes to focus on healthy skin I am always glued to what food and nutrients I can eat that will help maintain my youthful looking skin *looks in the mirror admiringly*. 
The major wow factor with this book is Brown’s ability to demonstrate and offer suggestions on how to work with various skin tones, bone structure, and an assortment of other features we can often worry about.  It also helps that this book has pages with full on color of various products from face powders to lipsticks.  I also appreciate that Ms.Brown did not write this book in an attempt to push her sales for her cosmetic line but rather to inform individuals on proper makeup application. 

So if you are even slightly interested in a book that is simple to read with a variety of skills that can be applied to practice, go ahead and purchase this book with your gift card money! ;)  I love this read and it allows me to brush up on any issues I may be having.  The book can be purchased here from Amazon.  By the way you can catch Bobbi Brown on NBC Today as the beauty editor for more tips if you are interested!
What do you think ladies?  Yay or Nay?

Thursday, December 22, 2011

Are You Red-y for Trouble?

Greetings!

Anyone that knows me well enough  knows that I always have my nails painted, reason being--I detest chipped nail polish, lol.  I change nail polish color every week to prevent the horror of looking down at my hands only to notice that the color has chipped.  This week I wanted to try something different, since I didn't want to stray too far from what I usually go with I decided to try out the Sally Hansen Salon Effects line of  "nail polish".  Since they were 75% off at CVS this week I decided to take it for a whirl and at $2.49 a pop how could I resist?

Take a look see at the product:


 Not bad, huh?  The product holds 16 nail strips, a nail file and a nail buffer that is divided on a miniature file, a cuticle pusher, and a set of instructions.


When I first opened the product I noticed a strong smell of well, nail polish, lol, I guess I was expecting it to not have scent considering that it isn't liquid--definitely not a problem.  I liked how it was packaged, well done, Sally.  Up next is a picture of my bare nails, the product advises that your nails are dry and free of oil.  Check!


I began applying the strips to my nails effortlessly until I had to switch hands.  Don't you just hate that?!  LOL  Anywho, upon applying it on my ring finger I noticed that I had put the wrong size strip, meaning the strip that I chose for my ring finger was actually supposed to be for my middle finger, boo to me!  Since I had already begun to rub the product onto my nail taking it off proved to be a task since I couldn't simply peel it off.  I would say that this is a good problem, this means that it won't easily come off, especially since it claims to last up to 10 days.  On to what I did to resolve the issue:


As you can see I tried peeling the strip off myself but that didn't work, then I tried using the cuticle stick that comes with product, NADA, so I had to resort to acetone.


Here's my poor little ring finger....but have no fear acetone is near!  You can purchase pure acetone from Sally's, that's where I normally get my bottle.  :)  Since this is pure acetone it has a tendency to make your hands dry which isn't necessarily a bad thing when using this product, just wash your hands before and dry them with a towel.  ;)   I went on to use a q-tip 1) because it is small enough so that I wouldn't ruin the polish on my left hand and 2) it fits into the hole of the bottle.  It was difficult to come off but again, this is a good problem.

Problem solved!  Now onto the end result.

Pretty, right?  I know!  The color is described as a red but I would probably lean towards a strong orange color.  The picture above is true to color and is beautiful when outside.  Since this is the first day I've had these on I can't speak for the staying power, I'll let you all know in 10 days, lol. I really like the color, not that original but hey still pretty.

So what do you think, ladies?  Nay or Yay?


So.....I Did It!

Greetings!

Welcome to our beauty blog, Cosmetic Diet!  I look forward to bringing you useful information from an over-saturated beauty market--providing you with the tools and product knowledge that will help you balance and get the most out of what you are looking for.  The confusion that can sometimes emerge from deciding on what product to use or evaluating what a brand promises is a task that I've undertaken and have grown to admire.  This is what I am here for, to make the buying decision easier for you through product reviews, product recommendations, and overall product lust.  As a consumer we always want what works best for us and I hope to be one of the leading beauty resources when it comes to making your final purchase. :)  So sit back and grab a cup of your favorite tea as we embark on this cosmetic journey together!

About Me

My photo
The Cosmetic Diet Blog was designed with the fun, flirty, and sassy woman in mind. Here you will find product reviews, beauty hauls, and candid conversations we can all enjoy. I look forward to sharing with you what I enjoy about being a young and vibrant woman in the city!